
Over the years, I have been the proud owner of two manual circular knitting machines, specifically the classic Sentro crank and handle style. A few years back, these little machines were absolutely everywhere. You could barely load up Instagram without seeing dozens of Reels featuring people whizzing up rainbow hats, long tubes, and all sorts of speedy projects at incredible speeds. Some clever crafters were even fashioning custom attachments so they could hook up a power drill and crank things out in seconds! A bit scary, but definitely fun.
While they were great to play about with for a week or two, the novelty quickly wore off for me and both my knitting machines ended up, rather sadly, in the bin. The main issue was their build quality. They felt beyond flimsy, broke far too easily, and had a nasty habit of creating catastrophic yarn tangles that ruined some truly lovely skeins in the process. It was thoroughly frustrating! In the end, I completely gave up and assumed my circular knitting machine dreams were officially over.
Fast forward to a little while ago, when I tested out Caydo’s electric yarn caking machine. It completely transformed my yarn corner and made winding my stash an absolute breeze! So when the lovely team at Caydo reached out to ask if I would like to try their brand new Caydo M1 Pro, I could hardly contain my excitement! Bear in mind this is a gifted item, but all opinions I share are honest and unbiased (as always).
Billed as the most advanced electric circular knitting machine on the market, the M1 Pro promises to take all the arm-aching hand-cranking and chaotic tangles out of machine knitting. Whether you want to whip up dozens of beanies for winter markets, speed through cozy tube scarves, or effortlessly crank out panels for garments, this machine claims to do it all at the touch of a button.
I have put this machine through its absolute paces over the last few days, testing different yarn weights, tension settings, and speeds. In this detailed Caydo M1 Pro review, I am giving you my completely honest breakdown, complete with pros, cons, step-by-step setup instructions, and my top tips to get perfect stitches every single time!
Table of Contents · Caydo M1 Pro Review: The Ultimate Electric Knitting Machine
Check Current Price & Availability for the Caydo M1 Pro Here!

Unboxing & First Impressions: What Is The Caydo M1 Pro?
Right out of the box, the Caydo M1 Pro feels like a serious upgrade from traditional manual circular knitting machines like the Addi Express or Sentro. Rather than relying on your own muscle power to turn a handle, the M1 Pro is fully motorized, delivering a smooth, consistent rotation that keeps your stitch tension nice and even.
Key Specifications & Features
- Operation: Fully electric with variable speed control settings.
- Knitting Modes: Both Tube (circular) and Panel (flat) knitting functions.
- Stitch Counter: Digital LCD counter for accurate row tracking.
- Yarn Tensioner: Multi-slot precision tension gate to handle varying yarn weights.
- Build Quality: Heavy-duty casing designed to minimize vibration during high-speed cranking.
Assembly is equally straightforward, thanks to an instruction manual that is genuine, clear, and easy to follow. We all know how notoriously baffling assembly guides can be in the crafting world, but this one is a very welcome exception. All in all, the initial unboxing experience felt remarkably solid, well considered, and thoroughly impressive.
The Caydo M1 Pro’s design is sleek, modern, and relatively quiet for a motorized craft machine. It sits solidly on the workbench without sliding around, which is a huge bonus when you are running a long tube project!
As well as being impressive straight out of the box, the Caydo M1 Pro comes packed with a generous selection of accessories. Inside, you will find spare hooks for the machine, a small tube of grease to keep everything running smoothly year after year, a crochet hook, yarn needles (both metal and plastic) and many more things, plus a durable zipped case that keeps all your bits and pieces neatly organized.


How to Set Up & Use the Caydo M1 Pro (Step-by-Step)
Setting up an electric knitting machine for the first time can feel a little intimidating, but once you master the initial cast-on, it becomes second nature! Here is my quick guide to getting started smoothly:
How to Cast On with the Caydo M1 Pro Knitting Machine
Getting your cast-on right is the absolute secret to smooth, jam-free machine knitting. While the M1 Pro makes the knitting process remarkably fast, taking a moment to thread the first row carefully will set your whole project up for success.
Here is the straightforward step-by-step method to get your yarn cast on properly every single time.

Step 1: Prep Your Machine and Locate Needle 1
- Place your machine on a flat, sturdy surface.
- Select your desired mode using the toggle switch (choose Tube mode for hats and cowls, or Flat mode for panels).
- Rotate the main dial or wheel until the start needle (the purple needle) is lined up directly in front of the yarn guide.

Step 2: Thread the Anchor Tail
- Pull a good length of working yarn from your skein – give yourself plenty of slack so there is no tension pulling on the machine.
- Drop the end of your yarn (a tail of around 30 to 40 cm) down into the centre of the machine tube.
- Secure this tail out of the way so it does not get caught as you turn the handle.

Step 3: The Alternating (In-and-Out) Cast On
This is the key step that anchors the yarn onto the needles before you start full rotation.
- Needle 1: Slowly turn the handle or dial until the first needle catches the yarn behind its latch hook.
- Needle 2: Guide the yarn behind the second needle so the hook skips it.
- Needle 3: Guide the yarn in front of the third needle so the hook catches it.
- Needle 4: Guide the yarn behind the fourth needle.
- Continue this alternating pattern (front of one needle, behind the next) all the way around the full circle until you return to Needle 1.

Step 4: Thread the Tension Guide and Yarn Carrier
- Once you have completed one full weave around all the needles, pop the working yarn into the yarn carrier notch.
- Slot the yarn through your preferred notch on the tension guide.
- Tip: For standard DK yarn, the middle tension slot usually works best.

Step 5: The First Full Turn
- Activate the power drive to complete your first full row.
- Watch closely as each hook catches the yarn and drops the loops down smoothly.
- Keep an eye out for any dropped stitches on this initial round. Once the second row catches, your cast-on is completely locked in place and you are ready to speed away!

Quick Tips for a Smooth Cast-On
- Use Scrap Yarn: If you want a perfectly clean, professional edge for a project (like a folded brim hat), consider casting on with 4 or 5 rows of waste yarn in a contrasting colour first, then switching to your main project yarn. The green yarn in my photos is my scrap yarn cast on. Full instructions on how to do this are available in the user manual.
- Watch Your Tension: Too tight, and the motor or handle will strain; too loose, and stitches will drop off the hooks. Keep a loose, even slack on your supply skein.

How To Make A Hat On The Sentro M1 Pro Knitting Machine
One of the biggest questions I had before unboxing this machine was just how versatile it would actually be in practice. We all know circular machines are brilliant for knocking out quick tubes, but the Caydo M1 Pro is capable of so much more than basic beanies once you start playing with its tube and panel settings.
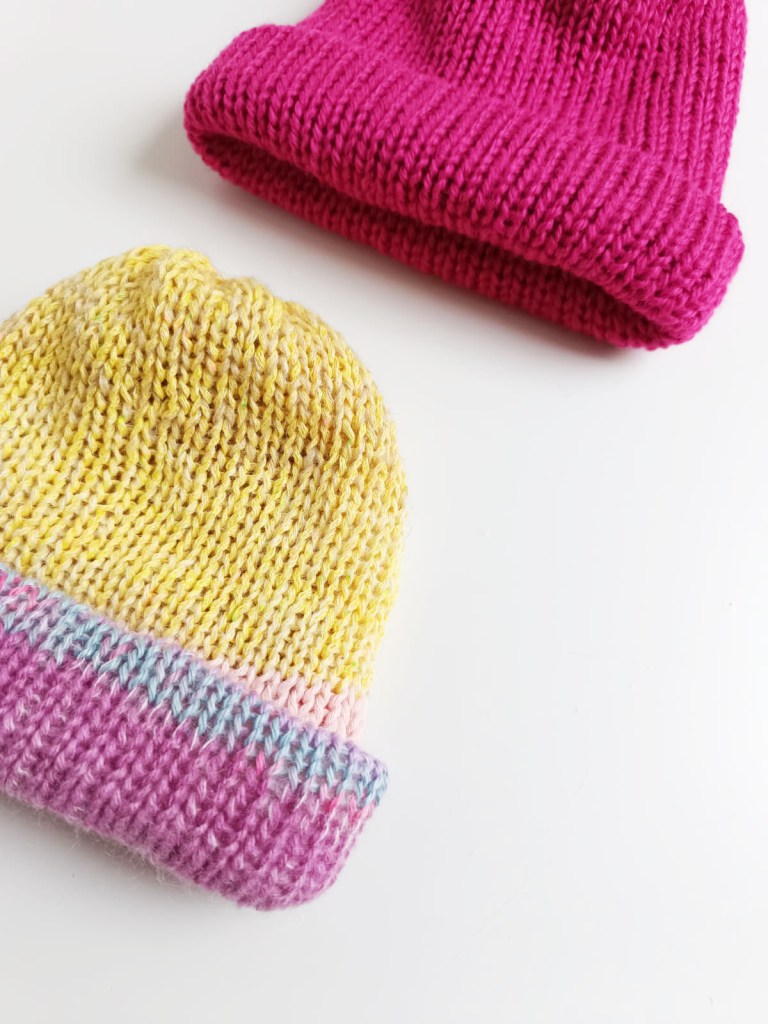
Whether you are looking to stock up a stall for winter markets or simply craft beautiful, quick gifts, one of my favourite things to make on my machine is a quick folded-brim toque hat. Here’s my how to guide with some handy tips and a cheat sheet!

Caydo M1 Folded Brim Hat Cheat Sheet
This sizing chart uses standard DK or light worsted weight yarn (Yarn Weight 3 or 4) on a 48-needle machine. Tension settings and yarn thickness vary, so exact measurements will depend slightly on your choice of yarn.
| Size | Age / Head Circumference | Total Row Count | Brim Fold Length (Approx.) | Notes |
| Preemie / Newborn | 30 – 35 cm (12 – 14 in) | 70 – 80 rows | 4 – 5 cm | Use lighter DK yarn for best fit. |
| Baby (0–6 Months) | 35 – 40 cm (14 – 16 in) | 90 – 100 rows | 5 – 6 cm | Very stretchy; cozy double layer. |
| Toddler / Child | 40 – 48 cm (16 – 19 in) | 110 – 120 rows | 6 – 7 cm | Great for everyday winter hats. |
| Teen / Small Adult | 48 – 54 cm (19 – 21 in) | 130 – 140 rows | 7 – 8 cm | Snug fit with a deep brim fold. |
| Standard Adult | 54 – 58 cm (21 – 23 in) | 140 – 150 rows | 8 – 9 cm | Most popular size for gifts/sales. |
| Large Adult | 58 – 62 cm (23 – 24.5 in) | 150 – 165 rows | 9 – 10 cm | Extra length allows a thick double brim. |
Step-by-Step Instructions
Materials Needed
- Caydo M1 48-Needle Knitting Machine (set to Tube / ‘T’ Mode)
- Main yarn: 80 – 120 grams of DK or light worsted weight yarn
- Scrap yarn: Contrast colour (about 2 – 3 metres for cast-on and cast-off)
- Yarn needle (darning needle)
- Scissors and tape measure
Step 1: Cast On with Scrap Yarn
- Set your machine switch to T (Tube mode) and reset your row counter to zero.
- Thread your scrap yarn into the machine, alternating behind and in front of the needles for the first circular pass.
- Place the scrap yarn into the thread guide (middle tension slot usually works best).
- Crank 5 to 10 rows in scrap yarn. This creates a clean edge that prevents your work from unraveling and makes finishing smooth.
Step 2: Main Body Knitting
- Snip the scrap yarn, leaving a short tail inside the centre of the cylinder.
- Tie your main project yarn to the scrap yarn using a light knot or simply place the main yarn tail into the guide.
- Reset your row counter to 0.
- Crank smoothly for your desired total row count according to the cheat sheet above (e.g., 140 rows for a Standard Adult size).
- Watch out for dropped stitches or tension slips as you crank, especially near the yarn guide.
Step 3: Cast Off with Scrap Yarn
- Snip your main yarn, leaving a long tail (about 40 cm) inside the cylinder for cinch-closing later.
- Thread your scrap yarn into the guide and crank 5 to 10 rows.
- Cut the scrap yarn, drop it into the centre, and keep cranking until all stitches naturally drop off the needles.
Step 4: Turning Inside Out & Folding the Brim
- Lay your knitted tube flat on a table.
- Pick up the main yarn tail from the bottom end (cast-on end). Thread your yarn needle through all the main yarn loops right where the scrap yarn meets the main work, pulling it tight like a drawstring to close the crown end. Gently unravel and discard the scrap yarn from this end.
- Do the same for the top end (cast-off end): thread the main yarn tail through all loops, cinch tight, and discard the scrap yarn.
- Now, push one cinched end straight down inside the tube until both cinched ends meet at the top. You now have a double-layered tube with both drawstring tops nested together.
- Secure the two top cinched ends together inside by tying the yarn tails securely and trimming the excess.
- Turn the entire hat so the desired right side is facing outward. Fold up the bottom rim by 7 to 9 cm to create your turned-up cuff.
Key Tips for Caydo M1 Success
- Yarn Thickness Matters: If your yarn feels stiff or cranky while turning the handle, switch to a looser tension slot on the yarn guide. Forcing thick yarn can cause dropped stitches or skipped teeth.
- Adding a Pom-Pom: If you like adding faux-fur or yarn pom-poms, pull the pom-pom attachment ribbons through the cinched top crown with a crochet hook before tying off securely on the inside layer.
The Caydo M1 Pro’s Pros and Cons: My Honest Verdict
No machine is 100% perfect for every single type of yarn, so here is my realistic breakdown of where the Caydo M1 Pro absolutely shines, and where you need to take extra care:
The Pros
- Effortless Speed & Production: You can crank out an entire adult-sized beanie tube in under 15 minutes without tiring your arm or shoulder!
- Ultra-Consistent Stitch Tension: Because the motor drives the cylinder at a steady RPM, the tension is far more uniform than manual hand-cranking.
- Digital Row Counter: Accurate and easy to read, meaning no more lost counts when you step away to pop the kettle on.
- Reduced Drop Stitches: The needle timing and gate design hold onto loops far more reliably than budget circular machines.
- Sleek Aesthetic: It looks brilliant in a modern craft space setup!
The Cons
- Yarn Sensitivity: Take extra care here, friends. Like all automatic circular machines, it prefers smooth, non-splitty yarns. Roving yarns or fuzzy mohair require extra supervision, ditto very chunky yarns. It’s not recommended to go beyond aran weight with this machine in order to avoid tangles and snapping off the hooks.
- Power Source Required: You need to be set up near a mains power outlet or a suitable portable power bank.
- Initial Learning Curve: You still need to monitor your cast-on and cast-off closely to avoid dropped loops.
- It’s pricey: This is qute an expensive bit of kit, but if you add up the cost of constantly replacing flimsy manual hand-crank machines, this is more than worth it! If you’re into this kind of circular knitting and plan on using it a lot, this is a real investment that will give you decades of fun and enjoyment.
Best Yarns to Use with the Caydo M1 Pro
To get the absolute best performance out of your Caydo M1 Pro electric circular knitting machine, yarn selection is key! Here are my personal top recommendations that run smoothly without tucking or dropping:
- DK to Light Aran Wool/Acrylic Blends: Smooth 100% acrylic or wool-blend yarns slide through the needles like butter.
- Paintbox Yarns Simply Aran: Fantastic colour range, strong structure, and glides effortlessly.
- Stylecraft Special DK: Budget-friendly, durable, and ideal for quick market make-batching!
- DROPS Nepal or Lima: Beautiful natural wool blends if you want a premium Scandi finish.

Frequently Asked Questions
Is the Caydo M1 Pro suitable for absolute beginners?
Yes! While machine knitting has a slight learning curve regarding cast-ons and yarn tensioning, the motorized drive actually removes one major variable (uneven cranking speed). Beginners can easily produce finished hats and scarves on their very first day!
Can the Caydo M1 Pro drop stitches?
Any circular machine can drop a stitch if the yarn tension fluctuates or if the yarn cake catches on something. However, the guided tension gate and motorized control on the M1 Pro drastically reduce dropped stitches compared to manual alternatives.
Is the Caydo M1 Pro worth the investment?
If you make items to sell, create gifts in bulk, or simply struggle with wrist and hand fatigue when hand-knitting or cranking manually, the Caydo M1 Pro is worth every single penny. It saves hours of physical labour!
Is Machine Knitting “Real” Knitting? A Word on Accessibility
There is often quite a lot of debate online as to whether using a knitting machine actually counts as real knitting, or whether it should be classed as a separate handicraft altogether. Well, I personally sit strongly and firmly in the camp of yes, knitting is knitting!
This kind of machine is not only a fantastic choice for makers who want to create items quickly for craft fairs and winter markets, but it is also a complete game-changer for accessibility. For crafters living with chronic pain, arthritis, or mobility struggles, traditional hand-knitting – or even constantly turning a heavy manual crank – can take a huge toll on sensitive wrists, hands, and shoulders over time. An electric machine like the Caydo M1 Pro allows people with disabilities and chronic health conditions to stay creative and keep making beautiful things without pushing their bodies past their limits!
Final Thoughts & Where to Buy
The Caydo M1 Pro is an absolute powerhouse. It takes all the charm and speed of tube knitting and elevates it into a truly professional, smooth experience. It has quickly earned a permanent spot on my workbench, and I can already tell it is going to be my secret weapon for holiday gift-making!
If you are ready to upgrade your craft room or speed up your market stock, I cannot recommend this machine enough.
Have a crafty day,


Leave a Reply