


Aren’t the colder seasons wonderful? Sure, the nights getting in, the rain and the cold might not be everyone’s cup of tea, but even the biggest Summer lover can’t deny that being cozy at home during Autumn and Winter is such a lovely feeling. Plus there’s Halloween and Christmas to look forward to! Monopoly and Mulled Wine! Pumpkins! Can you tell that I love A/W?!
Usually my go-to pattern designs for Autumn are those aforementioned pumpkins (check out my Spookette and Fairytale ones if you’d like to whip up some cool ones yourself), but this year I decided to go in a different direction and focus on an equally autumnal thingy – the humble toadstool! Some of you might know that I am based in the countryside of one of the coldest, wettest regions of Northern Spain so we are absolutely inundated with fungi of all kinds. From teeny ones popping up through the lawn to big ‘ole monster Puffballs sitting cutely in the fields behind our house, it’s a really wonderful thing to see toadstools and mushrooms taking center stage. Plus, my chickens love eating them so they provide a nice snack for our feathered friends, too.
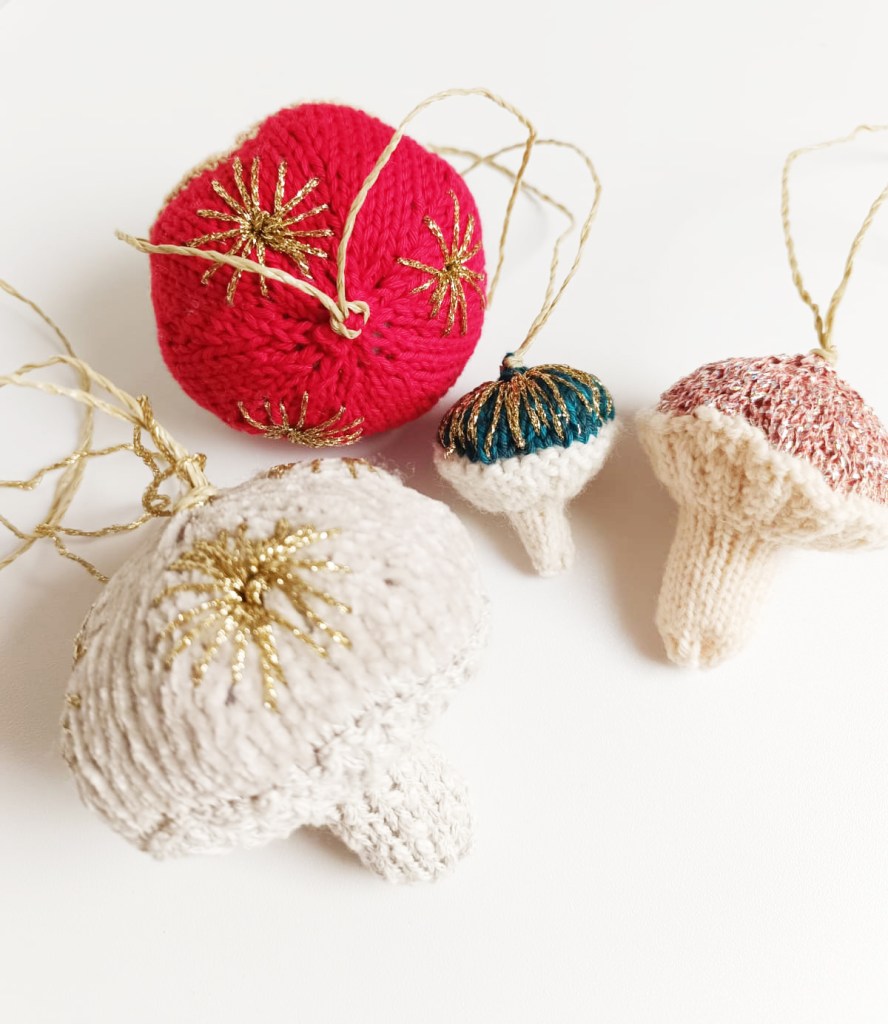
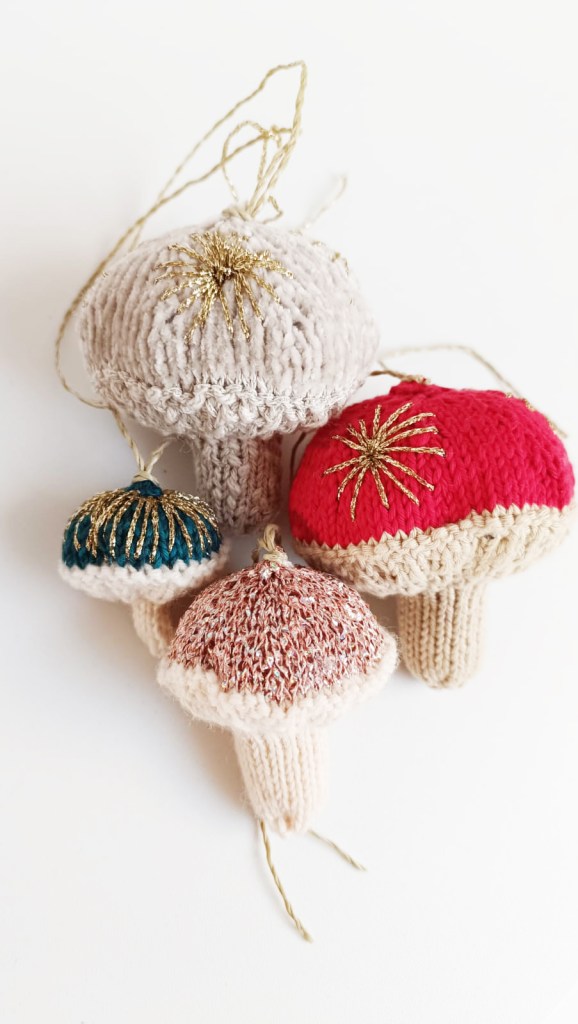
So, of course I’m thrilled to share the pattern for these gorgeously cozy, cute toadstools with you! This pattern will provide you with the basics of how to knit up your own toadstool and give you some cool ideas on how to jazz up your project with yarn ideas and embellishment tips. These toadstools look great hanging from a Christmas tree, a door handle or all snuggled up together as a centerpiece in a bowl. No matter how many you make or how you style them, they’ll look fantastic and really add a special touch to your A/W decor. Let’s go!
Tools, yarn, skills and extras:
LEVEL: intermediate or very confident beginner.
Yarn and materials:
· Less than 25g of DK weight yarn, ideally in cotton, wool or a blend. Feel free to use acrylic but natural yarns look a lot better in my opinion and don’t pill! You will need the main colour (MC) for the stalk and bottom of the cap and a contrast colour (CC) for the cap itself.
· 3.5 mm longer-length circular knitting needles, a stitch marker, scissors, yarn needle.
· Oddments of embroidery floss, glitter thread, buttons, sequins or whatever you like to decorate the cap of the toadstool.
· Fiberfill stuffing or leftover yarn to stuff your work.
Skills: Knitting on circular needles using the magic loop method, knit stitch (k), purl stitch (p), invisible join in the round, knit into the front and back of the stitch increase (kfb), knit two stitches together decrease (k2tog), cast on and bind off, weaving in ends.
Tips: Knitting on a small scale can be tricky – especially when using the magic loop – so don’t fret if you find it hard going at first. Practice makes perfect! Keep your first round relatively loose and you’ll find it a lot easier to work with.
If you’d like to make your toadstool bigger you can simply use bigger yarn and bigger needles. I recommend going down half a needle size than your yarn requires to keep your stitches tighter and stop the stuffing showing through.
These toadstools are perfect for using up scrap yarn and playing with texture. Try embroidering small stars on the cap (see my samples with gold thread for some ideas) to add a really glam, kitsch look. How about working with lamé yarn (see my pink, glittery toadstool) and making some disco-style ones? Maybe you could even experiment with fluffy yarn or variegated yarn? Either way your toadstools will look really unique and adorable.
Method:
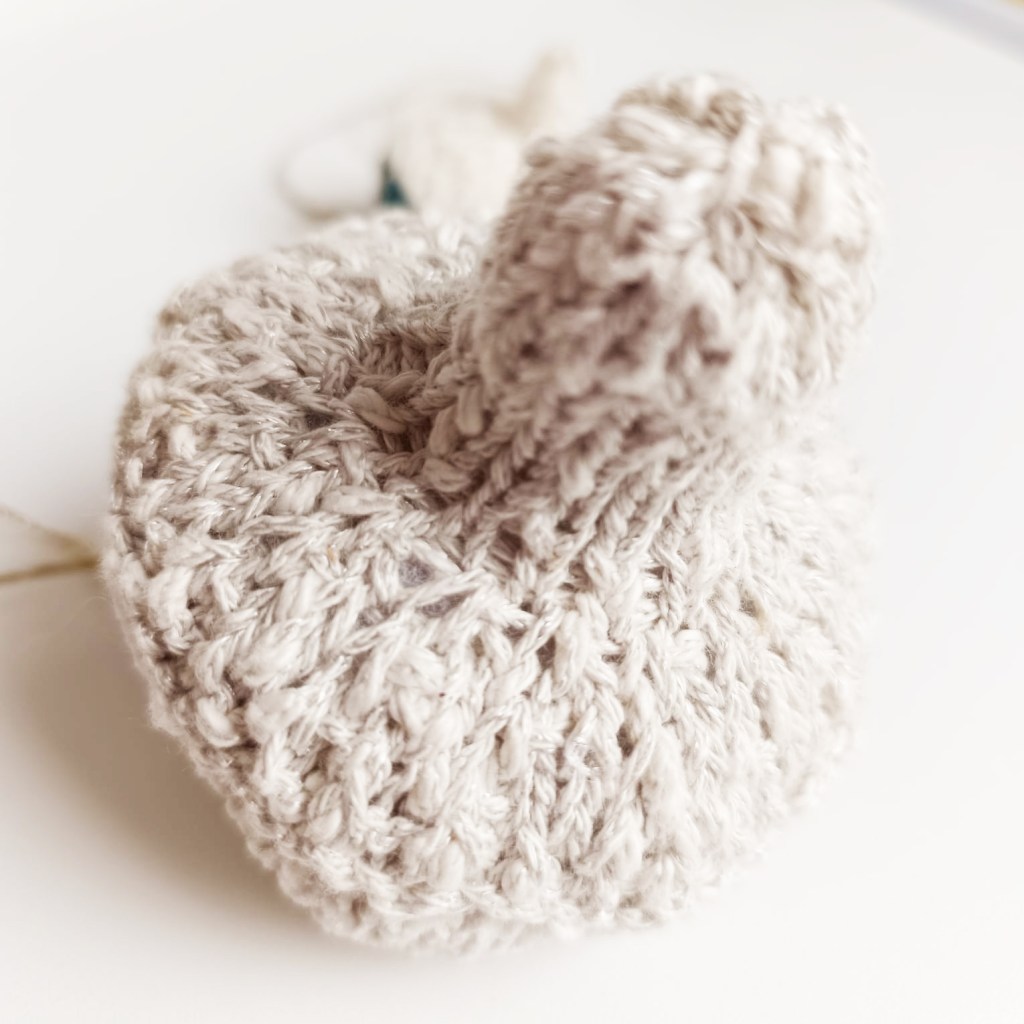
The stalk and base of cap:
In MC, cast on 17 sts and join invisibly by decreasing one st (16 sts).
Rds 1 – 16: Work in the magic loop and knit 16 rds plain.
Rd 17: ffb all sts around (32 sts).
Rd 18: k all sts around.
Rd 19: kfb, k1 around (48 sts).
Rd 20: k all sts around.
Rd 21: kfb, k2 (64 sts).
Rd 22 and 23: k all sts around.
Rd 24: *k1, p1 to end.
Rd 25: p all sts around.
The cap:
Change to CC.
Rds 26 – 29: k all sts around.
Rd 30: k3 (k2tog, k6) 7 times. K2tog, k3 (56 sts).
Rds 31 and 32: k all sts around.
Rd 33: k3 (k2tog, k5) 7 times, k2tog, k2 (48 sts).
Rd 34: k all sts around.
Rd 35: k2 (k2tog, k4) 7 times, k2tog, k2 (40 sts).
Rd 36: k all sts around.
At this point you can sew on any embellishments such as buttons or sequins. You can also embroider onto the cap when you have finished stuffing the piece (which is what I did) if you are comfortable doing this.
Rd 37: k2, k2tog, k3) 7 times, k2tog, k1 (32 sts).
Rd 38: k all sts around.
Rd 39: k2 (k2tog, k3) 7 times, k2tog, k1 (24 sts).
Rd 40: k all sts around.
Rd 41: k2tog all sts around (12 sts).
Rd 42: Bind off all sts.
Now you can stuff your piece using a knitting needle or crochet hook to push the stuffing into your work evenly, making sure it’s stuffed firmly. Thread the yarn tails through the cast on and bind off edges of your work and pull them tight to cinch closed. Thread the yarn around a few more times to secure them, knotting if necessary. Thread the ends into your work to hide them.
Now you’re finished you can add a hanging cord to the top of your toadstool which will allow you to hang it or just leave them as they are. Don’t they look lovely?
I really hope you enjoyed this pattern! I would love to see your work so remember to tag me on Instagram so I can share your creations.
Happy and cozy crafting,


Leave a comment