


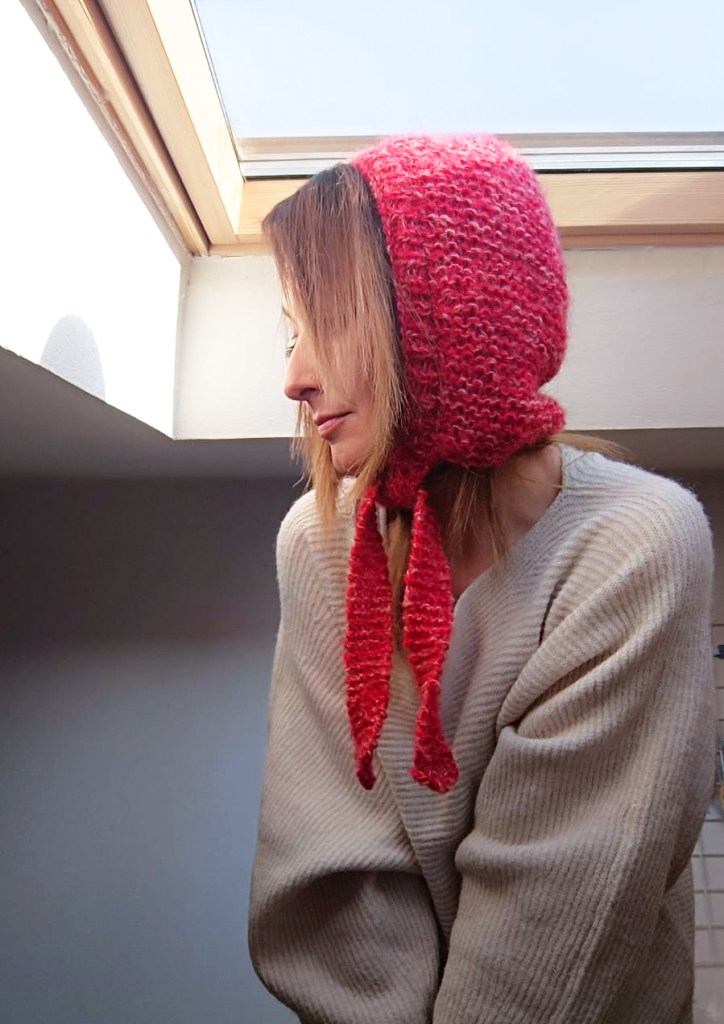
Unless you’ve been living under a rock lately, you’ll have noticed that knitted bonnets have become the go-to hand-knitted accessory. If – like me – you aren’t the biggest fan of hats (and what they inevitably do to your hairstyle once you take them off), a bonnet is a cute, slightly off-kilter way of keeping your head and neck warm ‘n’ whimsical during those cooler months.
What makes them so appealing is their versatility: whether you lean towards something something classic, or that “it-girl wandering through Paris” aesthetic, a bonnet has a way of elevating a winter look. Hats will always have their place (everyone loves a good hand-knitted beanie) but bonnets feel like the next step, right?
For the past few months, I’ve been researching, sketching, and generally obsessing over the ideal bonnet shape. And I’ve finally come to the conclusion that simple is best. This is the first of my bonnet designs that I’m sharing with you, and I couldn’t be happier with the construction. It’s straightforward, approachable, and doesn’t require you to be an advanced knitter which is always a bonus when it comes to approaching accessories and garments as a newbie knitter! The best thing is that this bonnet works up quickly, and although you definitely need to make sure your gauge is bang on, it is a forgiving style that fits most adult-sized heads and allows you to play around a bit with texture. I love it and I’m sure you will too.
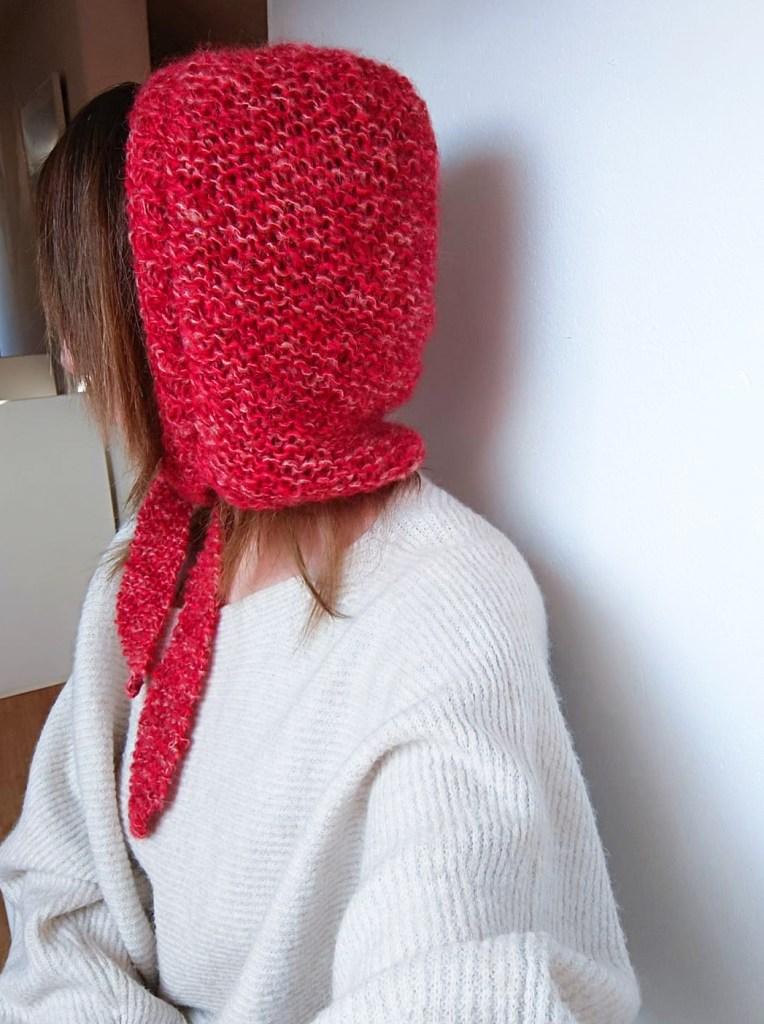
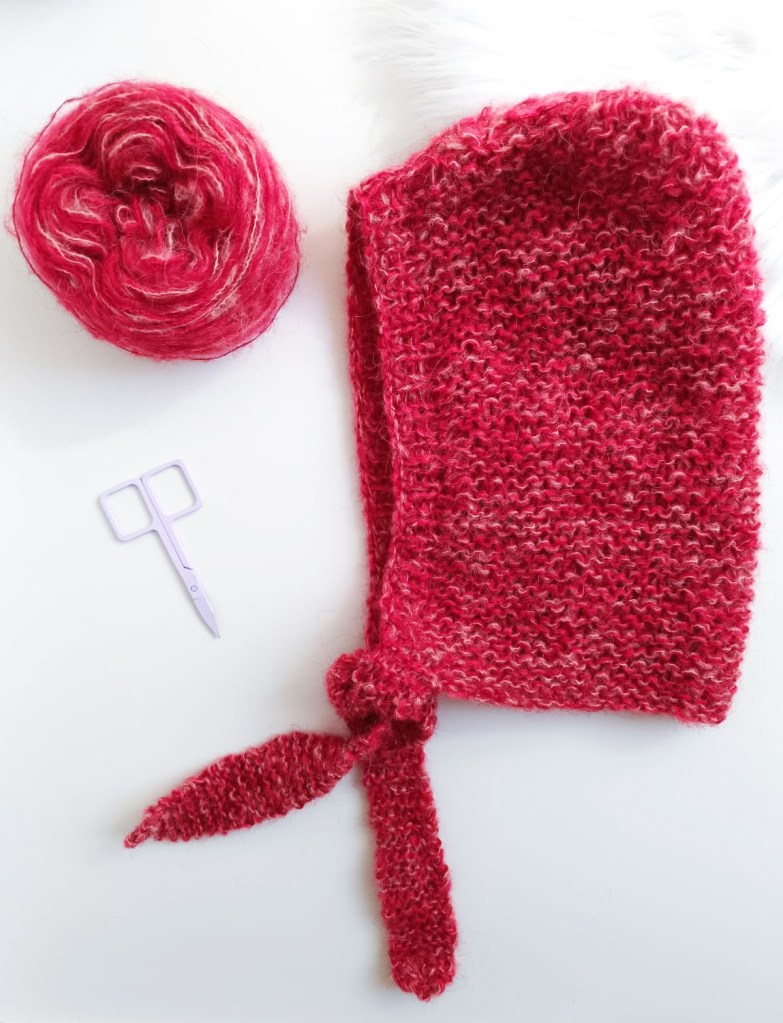
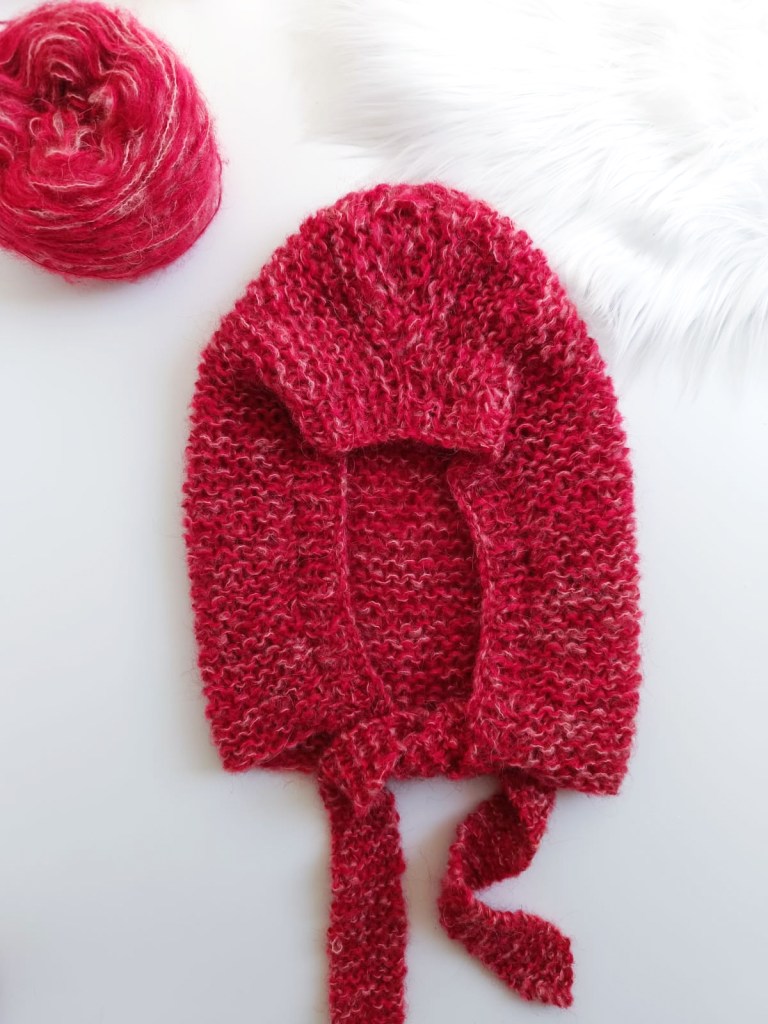
So, on to the story behind this pattern. After many weeks of false starts (and staring longingly at my mohair stash wondering how I’m ever going to get through it all) I finally came up with this sweet little design for the Porsen Bonnet. One of the best things about this design is how adaptable it is. You can customise it entirely to suit your taste, by keeping the ties short and minimal, or making them long and dramatic, allowing you to tie them in a show-stopping bow or keep them short like I did, allowing you to tie them loosely and keep your look low profile. The structure is light and airy but still structured and warm, and as you already know how much I adore garter stitch (the OG stitch with an unbeatable squishfactor), this stitch gives the bonnet a pleasing chunkiness.
Because the shaping is minimal, the construction is approachable for confident beginners, while still offering the chance to practise essential techniques like k2tog decreases and picking up stitches. These small structural elements add polish and shape without introducing unnecessary complexity. For this pattern, I held three strands of mohair-blend yarn together: two shades of red and one soft light pink, but you can obviously choose your own colour scheme. I love the idea of this bonnet knitted up in neutrals with a few brightly coloured thin stripes, in solid neon or keeping it scrappy using your own yarn leftovers. Whichever colourway or yarn composition you use, you’ll love this pattern and are sure to make yourself a few to match every outfit and maybe one for your cat?
The Porsen Bonnet
Suitable for confident beginner knitters
Construction
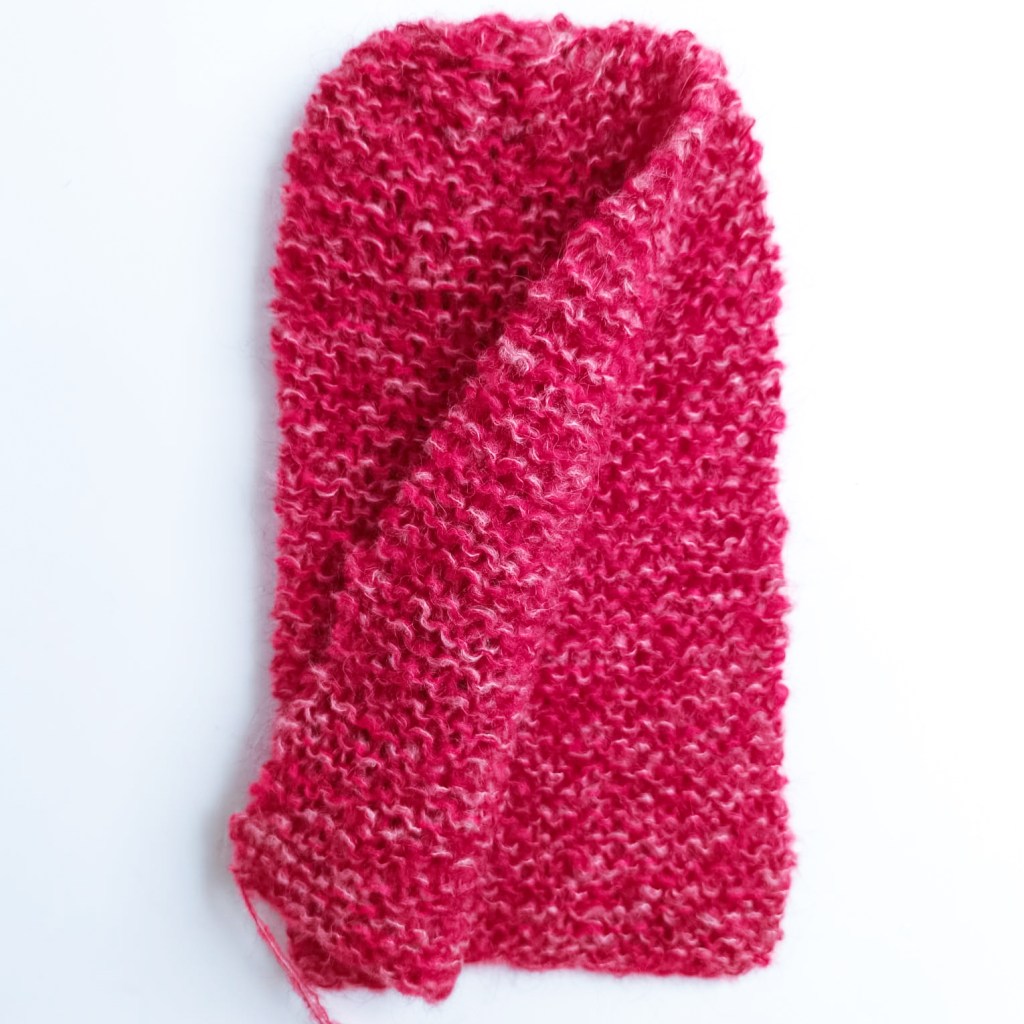
The bonnet is worked flat in one piece to create a simple rectangular base. Once the main body is complete, the fabric is folded and seamed along the top edge to shape the crown and form the bonnet structure. Stitches are then picked up evenly around the face opening to work the ribbed edging, which helps the bonnet sit neatly and comfortably around the face. The ties are also created from picked-up stitches and are worked directly onto the bonnet.
Size:
Width: 8″ (20.3 cm)
Height: 12″ (30.5 cm)
Fits a standard adult head as follows:
Women: 55 cm (21.7 in)
Men: 57 cm (22.5 in)
This bonnet could possibly fit an older child or teenager, but remember to measure the wearer’s head before casting on.
Yarn
Three strands of mohair-blend yarn held together throughout: two strands of Alpaca Blaze (46 & 49) and one strand of Hobbii Diablo (46). This creates an aran/worsted weight fabric (medium/#4).
Approx. 330–350 m/360 or 382 yards used in total. I used mohair blend yarns for this project, but where possible (and if your budget stretches) I always recommend using 100% natural fibres to give the best finish and texture.
Gauge
24 sts × 26 rows in garter stitch (blocked).
Needles & Notions
7.0 mm and 6.0 mm needles, yarn needle, blocking equipment.
Skills Needed
Long-tail cast on (recommended), knit, purl, k2tog, and picking up stitches along a garter stitch edge.
Abbreviations
co – cast on
k – knit
p – purl
k2tog – knit two stitches together
sts – stitches
Notes
When using multiple strands at the same time, it’s a good idea to roll the yarns together into a ball (or cake it up on a ball winder) to make it easier to work with.
Pattern
Using all three strands held together, CO 40 sts.
Knit every stitch until the piece measures 12.5 inches from the cast-on edge. (40 sts)
Shaping the Crown
Row 1: K2tog across the row. (20 sts)
Row 2: Knit all stitches. (20 sts)
Row 3: K2tog across the row. (10 sts)
Row 4: Knit all stitches. (10 sts)
Bind off all stitches loosely. Weave in ends. If your piece looks a bit wonky at this point, don’t worry. We will be picking up stitches on the garter edge later and blocking your work will also smooth things out.
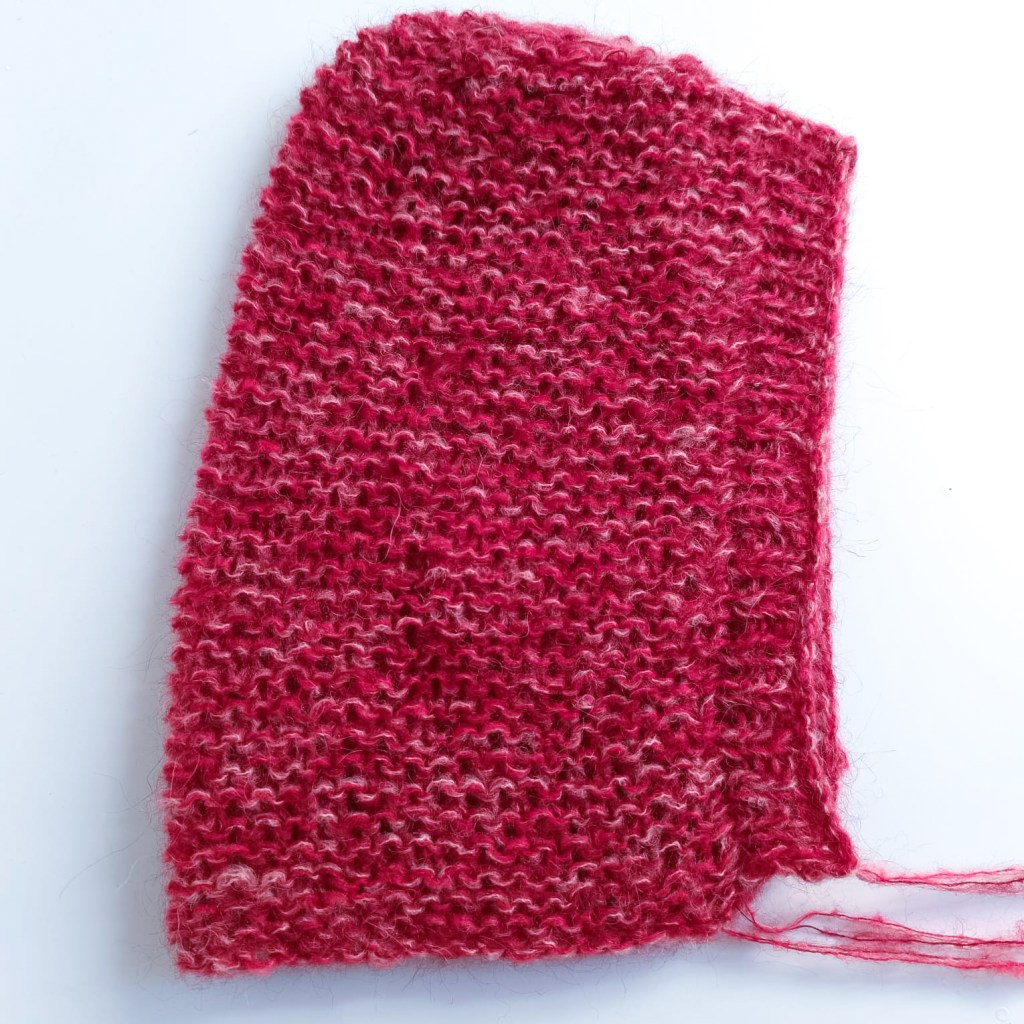
Seaming
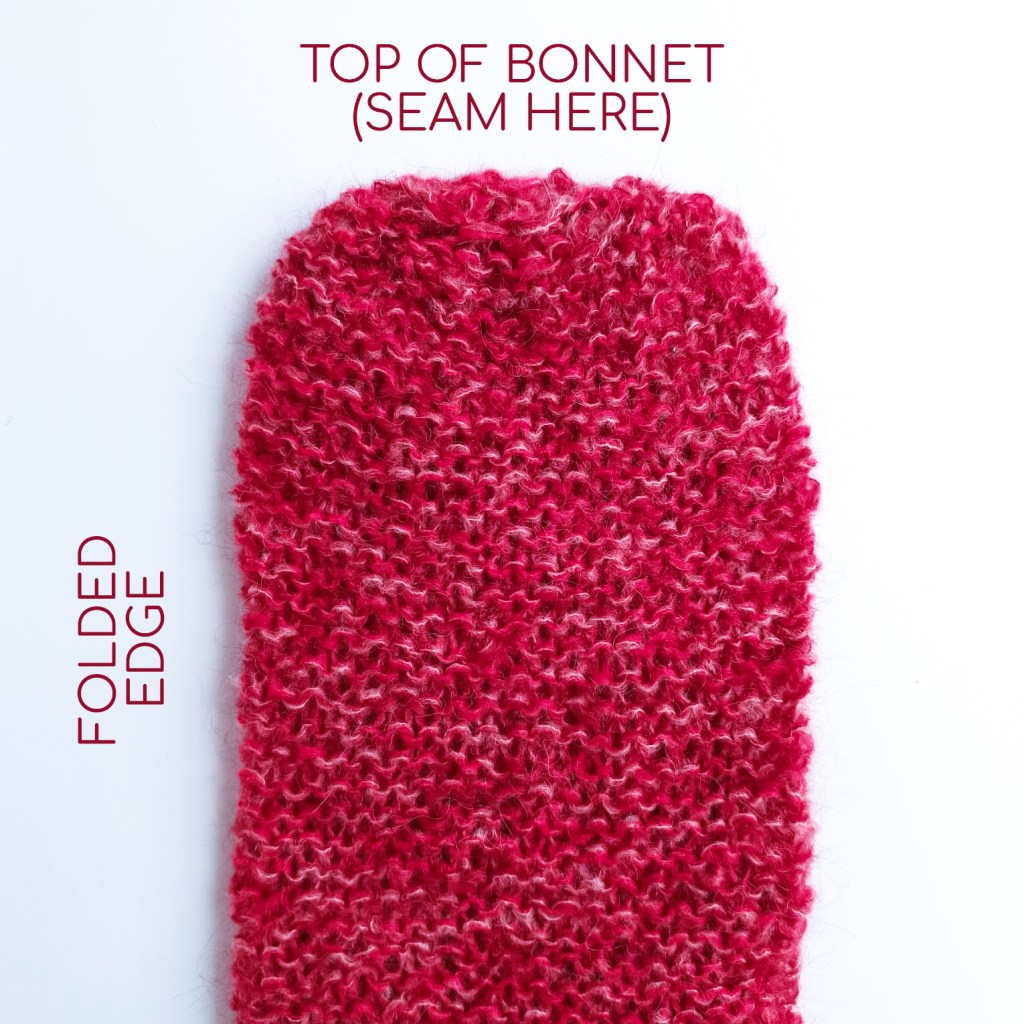
With the right side facing inward, fold the piece in half vertically and seam the top closed using mattress stitch or slip stitching with a crochet hook. Turn the bonnet right side out.
Ribbed Face Edging
Using 7.0 mm needles, pick up 72 stitches evenly around the face opening (the exact number is not crucial, so just ensure it’s an even number).
Rows 1–5: K1, P1 across.
Bind off loosely using 6.0 mm needles for a snugger edge, or 7.0 mm needles for a more relaxed finish.
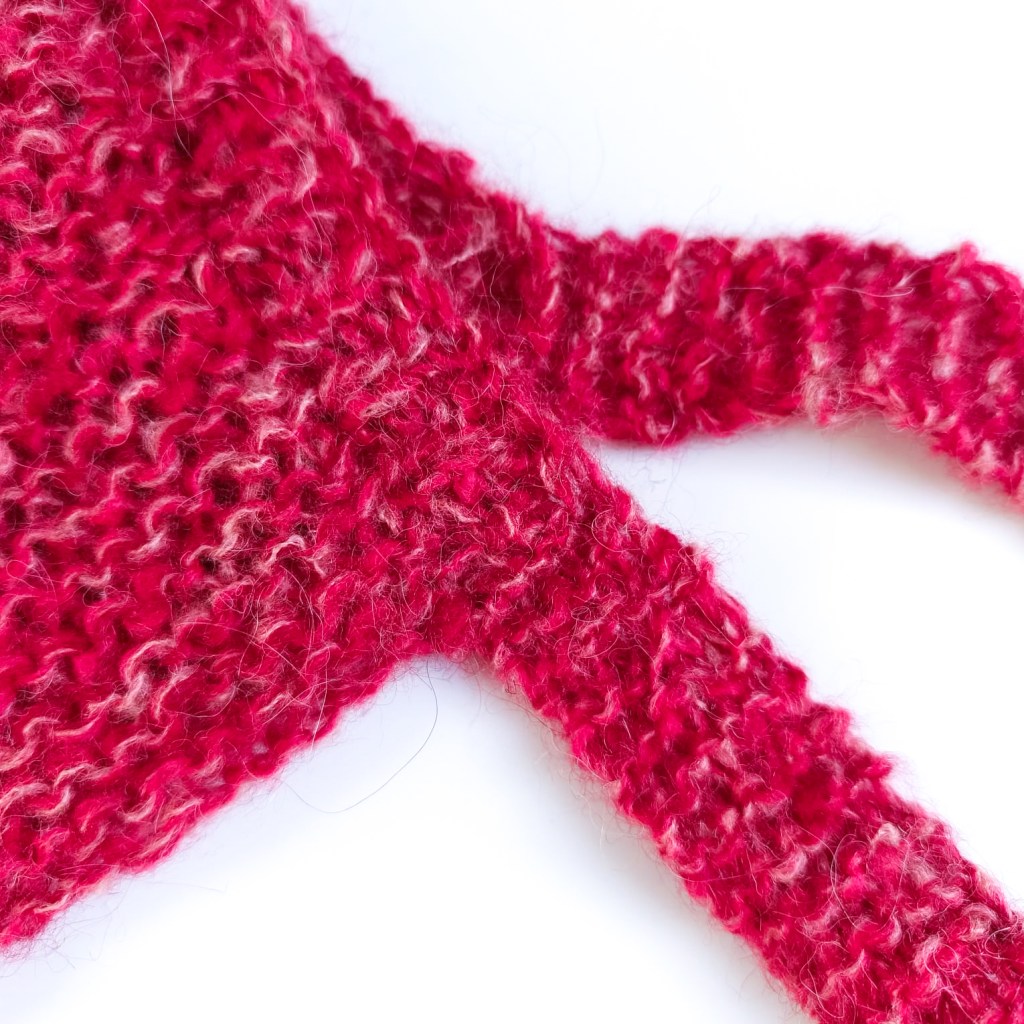
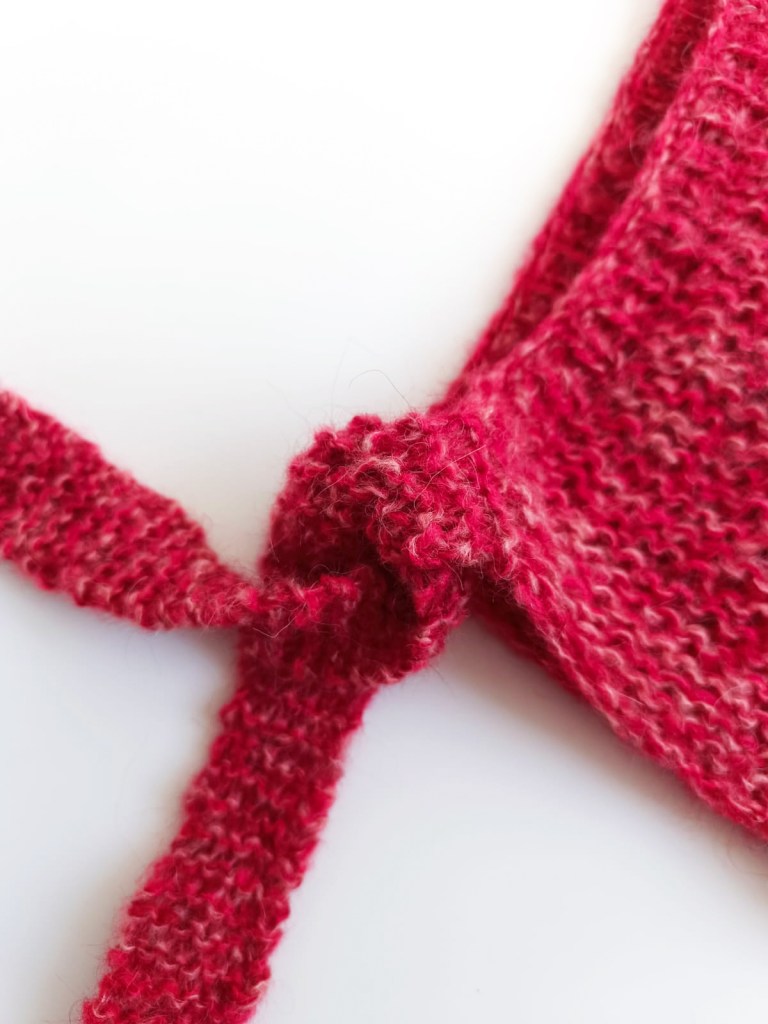
Ties
From the bottom edge of the bonnet, incorportaing the ribbed edge and the base of the gerter stitch body, pick up 7 stitches. Knit every row until the tie measures your desired length (sample shown: 12 inches / 30 cm). This length is enough to tie it secuerely under your chin but not enough for a big bow. If you’d like a more extravagant knot or bow, consider knitting double this length or more. The amount of yardage/meterage stated allows for this.
Shape the End:
Row 1: K2tog, knit until 2 sts remain, K2tog.
Row 2: Knit all stitches.
Row 3: K2tog, knit until 2 sts remain, K2tog.
Bind off all stitches and repeat on the opposite side.
Finishing
Weave in all ends neatly on the wrong side and gently block to shape.
Now you’re finshed and can take your bonnet out for a stroll!
If you loved this pattern and want to help me carry on offering you even more fantastic free projects, it’s be lovely if you could donate to me on Ko-fi! Thank you so much and happy crafting.

Leave a comment