

If you enjoyed my most recent free pattern, the adorable and now VIRAL (thanks!) Feesh, you’ll know that I adore knitting toys but I’m not such a fan of crocheting them. I’m not going to go on and on about that again (thankfully) but since the success of my little Feesh I thought I’d carry on making toys and create a whole army of knitted characters for you all to enjoy! Maybe one day I’ll write something about my theories on why crocheted toys seem to ‘do better’ than knitted ones and why amigurumi holds center-stage in toy making, but that’s for another day…
Anyway, over the last few months I’ve been slowly rediscovering small-scale knitting and the experience has been so calming, fun and inspiring. I was instantly brought back to when I started out on my knitting journey back in the early 2010s. Back in the day I would spend hours knitting up miniature people and small fruits and vegetables, enjoying working on a small scale on my circular needles, taking the time to think about outfits, accessories and other small details, above all loving working with simple shapes and emphasizing basic techniques. OG followers might even remember my knitted onions. They were ridiculous, right? Ridiculously FABULOUS!
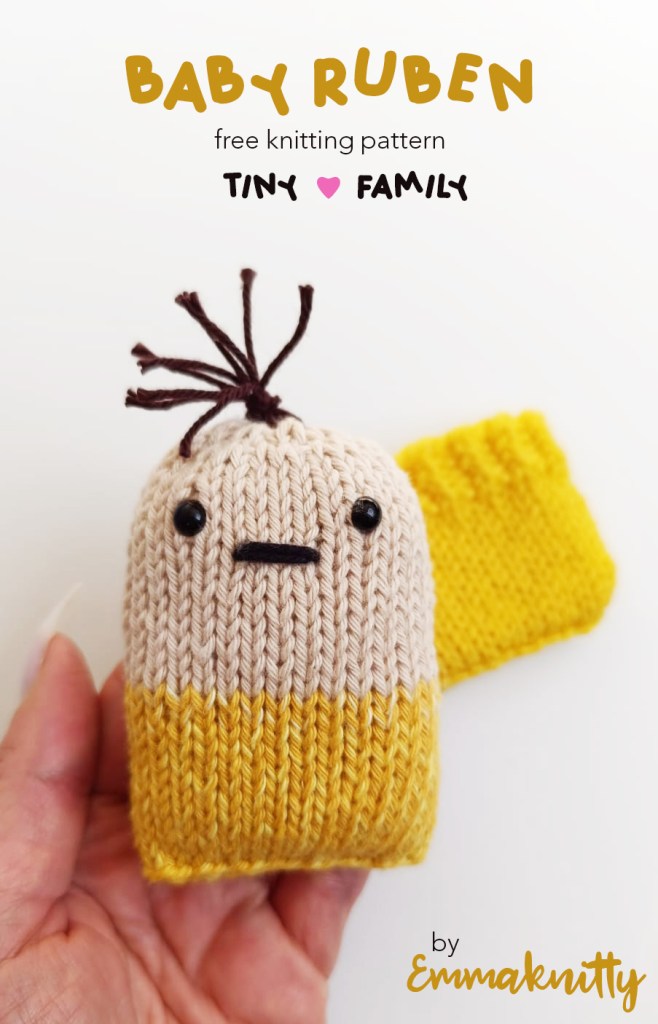
So, it’s my pleasure to offer this cute free pattern for you today which is part of my new Tiny Family collection of knitted toys. If you’ve been following my socials you’ll have seen Harriet (Halloween Harriet is her full name) and Clarence the Fisherman getting HEAVY rotation on my feeds, so I thought it was only right to share their Baby Ruben with you to say thanks for supporting me and being here.
This pattern is so adorable and so simple. If you’re confident beginner knitter who knows how to knit in the round, work basic increases and has some scrap yarn around then around you’ll really love this. It’s also a great way of practicing the techniques used in the pattern for Harriet and Clarence, so you can use Baby Ruben as a little stepping stone towards more complicated knitted toy patterns. Cool, huh? Let’s get to it and knit a baby!
PATTERN
Techniques and Abbreviations: Cast on (co), knit stitch (k), ktbl (knit through the back loop of the stitch), knit into the front and back of the stitch (kfb), bo (bind off), stitches (sts). You’ll need to know how to knit in the round using circular needles or double-pointed needles and how to join invisibly by casting on an extra stitch (instructions here). For Baby Ruben’s hair you’ll need to know how to make a tiny attached tassel (instructions here).
Yarn: Less than 15g of DK yarn (I used Hobbii Olivin in 04 and Sirdar Happy Cotton in Sandcastle) in two colours, yarn one and yarn two. For the sleeping bag you’ll need less than 15g of DK yarn, preferably 100% wool or a wool blend. I used Hobbii Friends Wool in 24.
Tools: 3.5 mm longer-length circular needles for the magic loop method or double pointed needles, a stitch marker, scissors, a small amount of scrap yarn or toy filling for stuffing, two safety toy eyes or embroidery thread if you prefer sewn on eyes.
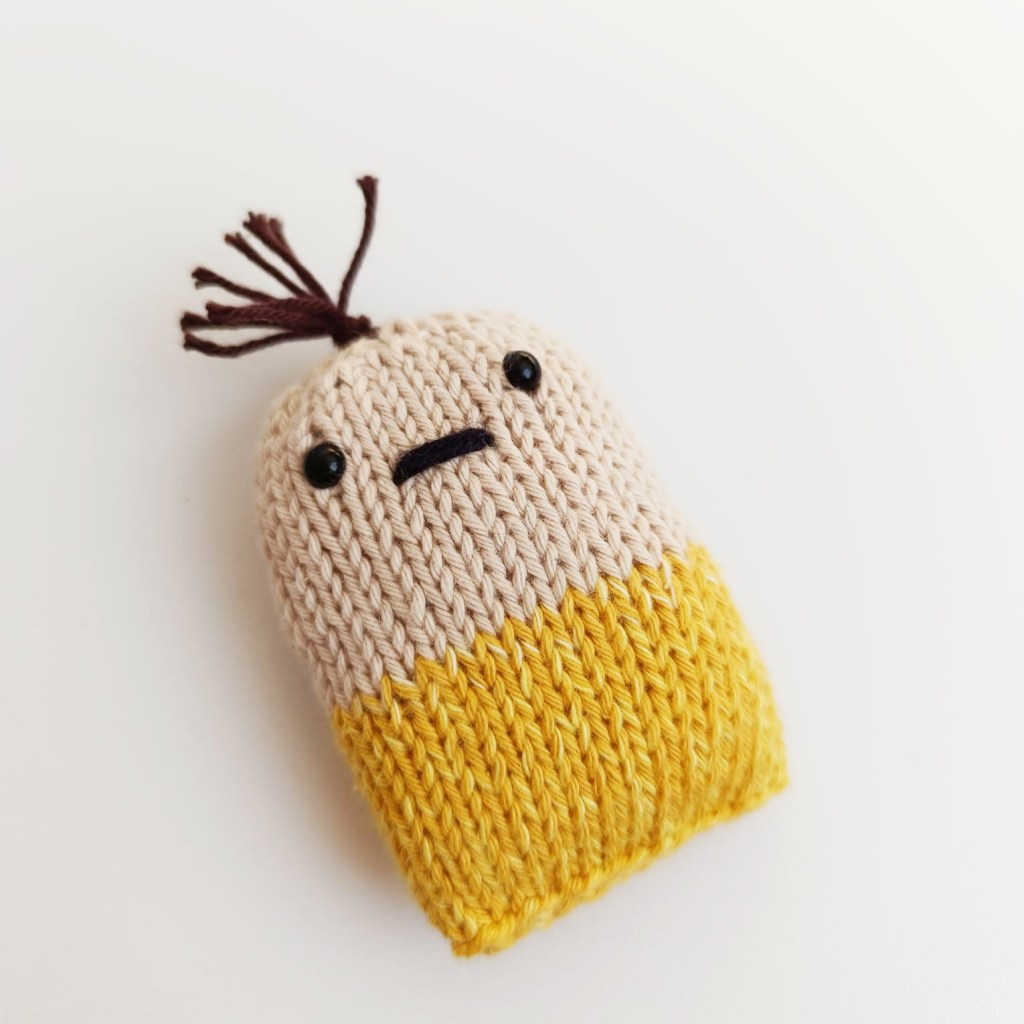
Face guide:

IMPORTANT: Be careful when using safety eyes if you’re planning on giving your finished Baby Ruben to a small child (under 36 months). It’s always best to embroider eyes onto items intended for gifting to young kids.
METHOD
- Co 11 sts in yarn one and join invisibly, decreasing one st (10 sts). Place marker to indicate the beginning of the round.
- Kfb all. (20 sts).
- K to end.
- KFB, K1 to end (30 sts).
- K 13 rds.
- Change to yarn two and knit 12 more rounds.
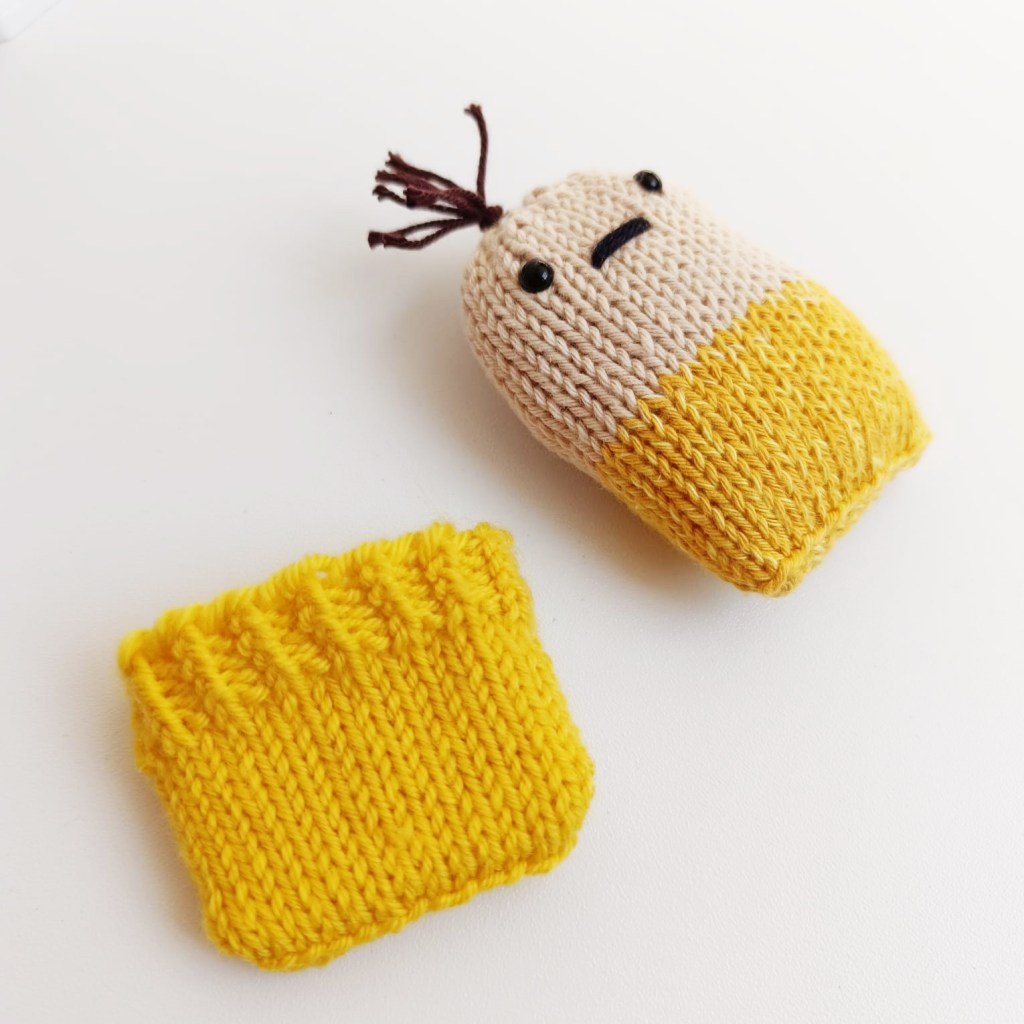
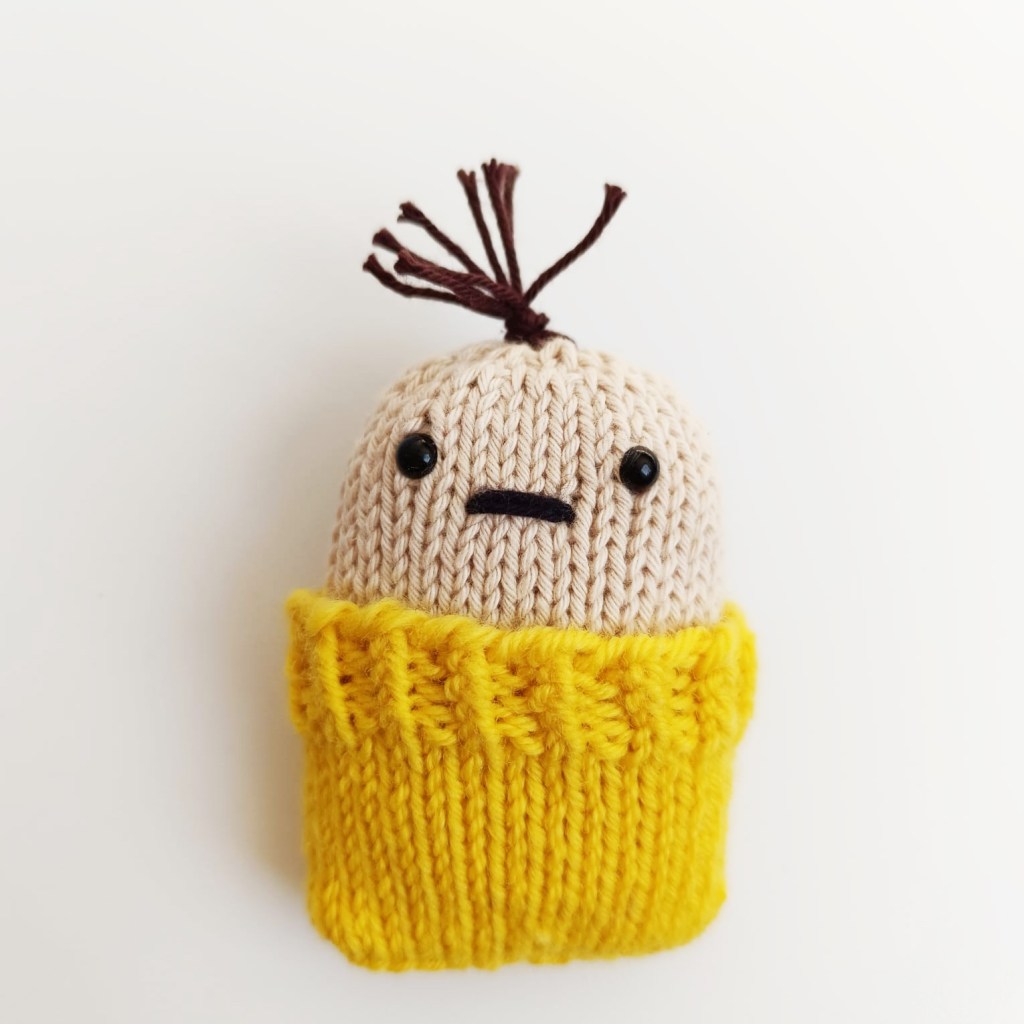
Cast off all sts. Embroider the mouth and attach the safety eyes using the face guide as reference. Make a tiny attached tassel on the top of the head for the hair and finally stuff your work.
MAKING THE SLEEPING BAG:
Using 3.5mm needles and yarn three, co 31 sts. Join in the round by decreasing one st and place a marker (30 sts).
Rds 1 – 5: k1tbl, p1 to end.
Rds 6 – 17: k every st to end.
Bo all sts. Seam bottom of sleeping bag and insert Baby Ruben.
The final step (optional) is to thread some jute twine onto a needle and thread it onto the face of the Feesh. This creates the hanging cord. Now you have finished and to make a dozen more!
If you loved this pattern, feel free to tag me on Instagram at @emmaknitty and use the hashtag #emmaknittybabyruben so I can check out and share your work! I’d also love to see any interesting colour combinations you come up with. Don’t forget that you can also check out the other members of the Tiny Family in my Etsy and Ravelry stores!
Have a lot of fun and enjoy!


Leave a comment